Cedar is beautiful, naturally rot-resistant, and the deck wood of choice across the GTA. It's also surprisingly easy to ruin with the wrong stain, wrong timing, or wrong technique. If you've ever seen a cedar deck with a blotchy, peeling, or prematurely grey finish, you've seen what happens when cedar-specific requirements are ignored. This guide covers everything you need to know about cedar deck staining in Toronto — the products that work, the conditions that matter, and the mistakes that cost homeowners every spring.
Why Cedar Is Different From Other Woods
Cedar is the dominant deck wood across Toronto and the GTA for good reasons: it's naturally rot-resistant, dimensionally stable, and beautiful. Western red cedar — the most common species on GTA decks — contains natural oils called thujaplicins that resist decay and insect damage better than most softwoods without chemical treatment.
But those same natural oils are exactly what makes cedar staining tricky. Cedar's oils can bleed through stains applied too early, causing adhesion failure. Its relatively soft, open grain structure absorbs stain unevenly if not properly prepared. And its natural tendency to grey rapidly when exposed to UV light means the right stain selection is critical.
Cedar vs. Pressure-Treated Pine
The other common GTA deck wood is pressure-treated pine or fir. While similar in appearance, it behaves very differently under stain. Pressure-treated lumber contains chemical preservatives throughout the wood that resist moisture — but also resist stain penetration until fully dried. Cedar relies on its natural oils for protection, making proper stain maintenance more critical but also more effective when done right.
Cedar's Relationship With Toronto's Climate
Toronto's climate creates specific challenges for cedar. Hot, UV-intense summers accelerate surface greying and oil depletion. The freeze-thaw cycle from November to March is cedar's greatest enemy — water penetrating unprotected checks and end grain freezes, expands, and physically splits the wood fibers from within. The humidity swings between seasons cause cedar to expand and contract, which is why film-forming stains that sit on the surface eventually crack and peel while penetrating stains flex with the wood.
The New Cedar Rule Everyone Gets Wrong
Every spring, homeowners call us after discovering that the stain they applied to their brand new cedar deck last fall is already peeling. The cause is almost always the same: they stained too soon.
New cedar — including cedar purchased from a lumber yard that appears dry — contains moisture content well above what stain requires. When wood is sawn at the mill, it begins the drying process, but this takes far longer than most people realize. A 2x6 cedar deck board can take 6 to 12 months to reach the 15% moisture content threshold required for proper stain adhesion.
The Moisture Trap
When stain is applied over wet wood, it forms a barrier on the surface before the wood has finished releasing moisture. That trapped moisture pushes outward as the wood continues to dry, lifting and blistering the stain from underneath. Within one freeze-thaw cycle, the result is widespread peeling and flaking — a complete stain failure requiring full stripping and reapplication.
How to Test If Your Cedar Is Ready
A moisture meter is the definitive tool — any reading below 15% is ready. A simple field test: sprinkle water on the surface. If it beads and runs off, the wood is still releasing moisture and too wet to stain. If it absorbs into the wood within 30 seconds, it's ready. New cedar will typically bead water for the first 6 months or more.
What to Do With New Cedar
Let it weather for a full season before staining. During this period, you can apply a UV-resistant clear cedar oil to slow greying if aesthetics matter to you — but hold off on coloured stain until the wood has properly dried. The wait is frustrating but the alternative is a failed stain job and a significant extra cost.
Choosing the Right Stain for Cedar
The stain market is overwhelming, and the wrong choice on cedar is expensive. Here's how to think about it.
Penetrating vs. Film-Forming Stains
This is the most important distinction for cedar in Toronto's climate.
Penetrating stains (oil-based and modified oil) soak into cedar's wood fibers rather than forming a coating on top. They protect from within, flex with the wood's seasonal movement, and when they eventually fail, they do so gradually — fading rather than peeling. They're the professional standard for cedar decks in the GTA.
Film-forming stains (solid acrylic/latex) create a paint-like coating on the wood surface. While they offer maximum colour coverage and hide weathered wood well, they fight against cedar's natural movement. In Toronto's climate, the film cracks at expansion joints — typically within 2 to 3 years — allowing water entry underneath. Once water gets beneath a film-forming stain, the result is widespread lifting and peeling that requires complete stripping before reapplication.
Transparent, Semi-Transparent, or Solid?
- Clear/Transparent: Maximum wood grain visibility, minimum colour protection. Requires reapplication annually on GTA cedar in full sun. Best for new, pristine cedar where showcasing the natural beauty is the priority.
- Semi-Transparent: The most popular choice for GTA cedar decks. Shows grain pattern while providing meaningful UV and moisture protection. Lasts 2 to 3 years professionally applied. The best balance of aesthetics and protection for most Toronto properties.
- Semi-Solid: More colour coverage than semi-transparent while retaining some grain visibility. Good for cedar that has some greying or inconsistent colouring but isn't damaged enough to require a solid stain. Lasts 3 years in most GTA conditions.
- Solid: Maximum colour and moisture protection, zero grain visibility. Best for heavily weathered cedar or when a uniform colour transformation is the goal. Lasts 3 to 4 years but commits you to a film-forming product — future maintenance will always require solid application.
What to Look for on the Label
For cedar in the GTA specifically, look for products that specify:
- UV inhibitors or UV-blocking pigments
- Mildewcide additives (essential for Toronto's humid summers and shaded lots)
- Application temperature above 10°C
- Cedar or softwood compatibility
- Canadian or northern climate rating
Preparation: The Step That Determines Everything
Stain quality accounts for perhaps 30% of the final result. Preparation accounts for the other 70%. A premium stain applied over improperly prepared cedar will fail prematurely every time. Mediocre stain applied over a properly cleaned, dried, and brightened surface will outperform it.
Power Washing Cedar
Cedar requires careful pressure washing — lower PSI than most other woods. The guidelines for proper cedar washing:
- Maximum 800 PSI for general surface cleaning
- Fan tip nozzle (25 or 40 degree) — never a zero-degree tip on cedar
- Minimum 30cm distance from the wood surface
- Always wash with the grain direction, never across it
- Use a pH-neutral wood cleaner — not household bleach, which damages cedar fibers
Wood Brightening
After washing, cedar that has been previously stained or has greyed significantly needs a wood brightener application. Brighteners are oxalic-acid based solutions that remove tannin staining, iron staining from hardware, and the grey oxidized surface layer — revealing the fresh, light wood beneath. This step is not optional for grey or previously stained cedar. Without it, new stain applies over a compromised surface and adhesion is poor.
Sanding
On new cedar, light sanding with 80-grit paper opens the grain for better stain penetration. On previously stained cedar, sanding removes raised grain, smooths rough spots, and removes any remaining old stain that wasn't lifted by washing and brightening. Always sand with the grain on cedar — cross-grain scratches are very visible under semi-transparent stain.
Drying Time
After washing, cedar needs 48 to 72 hours of dry weather before staining. In Toronto's fall conditions with lower temperatures and higher humidity, allow the full 72 hours. Test moisture content before applying. Skipping drying time is the fastest route to a failed stain job.
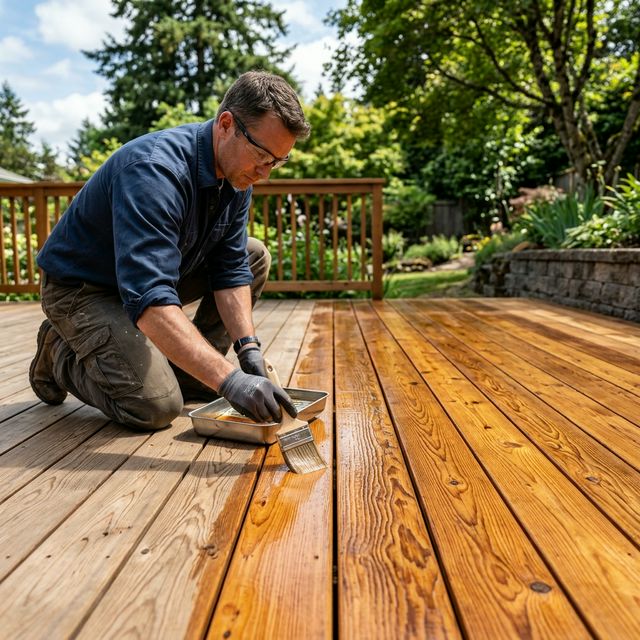
Application Technique for Cedar
Even the right stain on properly prepared cedar can fail if applied incorrectly. Cedar's open grain structure and natural oils require specific technique.
Brush vs. Spray vs. Roller
Brush: The professional standard for penetrating stains on cedar. A brush forces stain into the grain and ensures complete coverage of all surfaces including end grain and between-board gaps. Slower than spray but produces the most durable result.
Back-brushed spray: Professional crews often spray first for speed, then immediately back-brush the wet stain to work it into the grain. This combines the speed of spray with the penetration of brush application. The best technique for large cedar deck surfaces.
Roller alone: Not recommended for penetrating stains on cedar. Rollers don't drive stain into the grain effectively and tend to produce inconsistent coverage on rough-sawn cedar surfaces.
Wet Edge and Lap Mark Prevention
Lap marks are a common problem on cedar — they occur when stain dries at the edge of an applied section before the next section is started. On cedar's open grain, these dried edges become permanent streaks visible in certain lighting. Prevent them by:
- Working in sections of 2 to 3 boards at a time, full board length
- Maintaining a wet edge at all times
- Staining on overcast days or in shade where possible — direct sun flash-dries the stain before it penetrates
- Never stopping mid-board
End Grain Sealing
The cut ends of cedar deck boards absorb moisture at up to 10 times the rate of the face grain. End grain sealing with a dedicated end grain sealer before staining is a professional step that dramatically extends cedar deck life. The ends of boards — at steps, edges, and any cut ends — should receive double the stain coats or a dedicated end grain treatment.
Cedar Staining and Toronto's Climate
Toronto's microclimate varies significantly across the GTA, and those variations affect cedar deck maintenance strategies.
Downtown Toronto
Dense tree canopy in neighborhoods like Rosedale, The Annex, and Riverdale creates shade that slows moisture evaporation and accelerates mildew growth. Cedar in these conditions benefits from mildewcide-fortified stains and more frequent cleaning cycles — even without restaining, an annual light wash prevents mold from building up on the surface.
Suburban GTA
Open suburban lots in Vaughan, Markham, and Brampton expose cedar to maximum UV and wind. These decks grey faster and require UV-heavy stain formulations. South-facing cedar in full sun in these areas can need restaining every 1.5 to 2 years rather than the standard 2 to 3.
Lakefront Properties
Oakville and Mississauga waterfront properties face the most aggressive cedar maintenance challenge in the GTA. Constant ambient humidity from Lake Ontario, combined with salt-laden air and heavy UV exposure, demands marine-grade stain products and more frequent application cycles than inland properties.
Cedar Maintenance Schedule for GTA Decks
A properly maintained cedar deck in Toronto should follow this general rhythm:
- Every spring: Light cleaning and inspection. Check for winter damage — loose boards, raised fasteners, soft spots. Clean off mold or algae that developed over winter.
- Every fall: Deep clean and assessment. If the water-bead test shows absorption, restaining is needed before winter. If the stain is still performing, a light cleaning and touch-up of end grain is sufficient.
- Every 2 to 3 years: Full professional restoration — power wash, brighten, sand as needed, and apply fresh stain coats. This is the baseline for most GTA cedar decks under normal conditions.
- After severe weather events: Inspect after hail storms or ice storms. Hail can damage cedar surface significantly and create entry points for moisture.
Following this schedule extends the life of a cedar deck significantly — well-maintained cedar decks last 25 to 40 years. Neglected cedar decks often require complete replacement within 10 to 15 years.
Beaver Wood Restoration specializes in cedar deck staining across Toronto, Vaughan, Mississauga, Markham, Richmond Hill, Oakville, Brampton, Aurora, and King City. Get a free quote and let our team assess your cedar deck's specific needs.
Frequently Asked Questions
Can I stain a brand new cedar deck right away?
No — this is the most common and costly cedar mistake in Toronto. New pressure-treated cedar contains moisture levels well above the 15% threshold required for stain adhesion. Applying stain too soon traps moisture in the wood, causing the stain to peel within months. New cedar decks need a minimum of 6 months — and ideally a full year — to dry and weather before staining. The exception is if your cedar is kiln-dried (check with your supplier), which can be ready sooner.
How often does cedar need to be restained in Toronto?
A professional-grade semi-transparent oil stain on cedar in Toronto typically needs reapplication every 2 to 3 years. South-facing decks in full sun require more frequent attention — sometimes annually for the top coat. Solid stains on cedar last 3 to 4 years. The real indicator isn't time — it's when water stops beading on the surface and starts absorbing into the wood. That's your signal to restain.
What's the best stain for cedar in Toronto?
For most cedar decks in the GTA, a penetrating oil-based or modified oil semi-transparent stain offers the best combination of protection and longevity. Avoid film-forming products like solid latex paint — they sit on cedar's surface rather than penetrating it, and peel aggressively in Toronto's freeze-thaw cycle. Look for products with UV inhibitors, mildewcide additives, and Canadian climate ratings. Premium contractor-grade penetrating oils with these properties have strong track records on GTA cedar.
Why does my cedar deck keep turning grey?
Greying is UV oxidation — sunlight breaks down the lignin in cedar's surface fibers, turning them grey. It's a surface phenomenon and doesn't harm the wood structurally, but it signals that UV protection has depleted. A cedar brightener strips the grey oxidized fibers to reveal fresh wood underneath, and a quality UV-blocking stain slows the greying cycle significantly. Skipping UV-protection in your stain product is the primary reason cedar goes grey prematurely.
Can I pressure wash cedar before staining?
Yes, but technique matters enormously. Cedar is a softwood with a relatively low density — high-pressure washing damages the wood fibers, raises the grain, and creates a fuzzy surface that holds stain unevenly. Professional cedar cleaning uses low to medium pressure (500–800 PSI maximum), a fan tip nozzle, consistent distance, and specialized wood cleaning solutions rather than raw pressure. Always wash with the grain, never across it.
Get Your Free Quote
Fill out the form below and we'll get back to you within 24 hours with a personalized quote for your property.